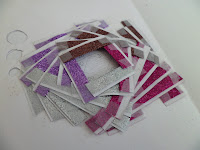
Have you ever wanted to make a card for an occasion and not known how to make it look extra special? Well here's how you do it...
1. Cut your design out of a piece of card. You may need to go online and look for one as you need the guide sheet to go underneath your card.

2. Choose 4 different colours of paper (wrapping paper, coloured paper, ribbon, etc) and fold them 3 quarters of the way up, as shown in the picture.
3. Cut a strip of clear sello-tape and stick it to a book or table. Make slits all the way along the piece of sello-tape so that when you are about to stick something down you can quickly pull a piece off.
4. Get your first colour ready and find number 1 on your guide.
5. Put the piece of paper so that the line of number 1 matches where the edge of your paper comes to. Stick it down.
6. Cut it to size and stick the other side down.
7. Now find number 2 on the guide. Use your second colour of paper.
8. Cut it to size and stick both sides down.
9. Find number 3. Use your third piece of coloured paper. Cut it to size and then stick both sides down.
10. Do the same for colour number 4.
11. Once you have done numbers 1-4 on your guide you need to go back round all of your pieces of paper and carry on with the numbers.
12. This picture is an example of what it should look like when you are about to finish.
13. A finished Iris Folding.
14. Fold a piece of A4 paper in half and cut down the middle.
15. Stick it over the area where you have been working. This covers up your working so that the person who you give it to has a nice neat finished card.
THE FINISHED IRIS FOLDING CARD! ENJOY!


Wow! The ard you made looks so professional! It is most definitely a special card to give to those you love, worth the effort!!!
ReplyDelete